
Virtual meetings are now an important part of how we communicate in the digital age. They connect us across distances and allow us to collaborate easily. Sometimes, technical problems make online interactions less convenient.
Virtual meetings can be disrupted by the “Camera blocked on Google Meet” message. This mysterious message can suddenly stop your video from being seen by others.
This guide helps you fix camera problems in Google Meet for a smoother experience. Discover ways to make Google Meet better for cameras and fix common problems.
Contents
- 1 Understanding the Problem
- 2 Troubleshooting Steps
- 3 Google Meet Settings:
- 4 Common Error Messages and Solutions
- 5 Conclusion
Understanding the Problem
The “Camera blocked” message on Google Meet happens because of different things. These include browser settings, device permissions, and privacy concerns. This issue may happen if the camera and microphone settings in the browser clash with Google Meet’s requirements. It can also occur if the operating system limits these resources.
If you’re concerned about privacy, using browser extensions or security software can disable the camera. Users cannot share their video during important meetings when they receive this message. This emphasizes the need to fix the problem quickly. To keep the platform working well and collaboration smooth, we need a quick solution.
When we get the “Camera blocked” message, we remember to change our access and privacy settings for online video calls. To fix camera issues on Google Meet, users should know what causes them. This allows for smooth communication in virtual meetings.
Troubleshooting Steps
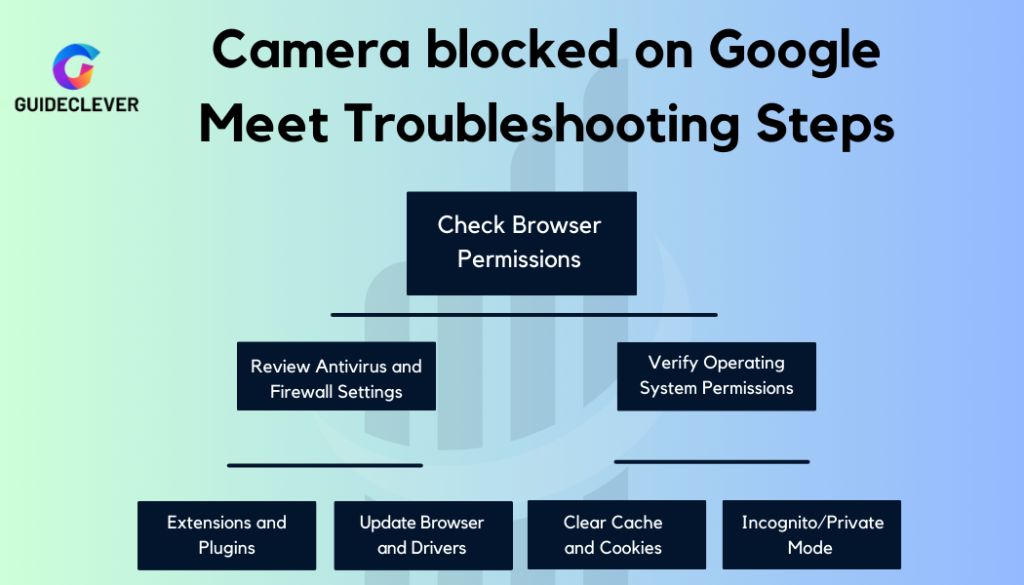
Dealing with technical problems can be annoying, but you can handle them well with a methodical approach. If you see a “Camera blocked on Google Meet” message, follow these steps to fix it.
1. Check Browser Permissions:
Accessing your camera and microphone is crucial for video conferencing on Google Meet. Before you join a meeting, check that your browser can access the camera to avoid any issues. Follow these steps to grant permissions:
1. Google Chrome:
- Click on the Lock Icon: When you’re on a website, you’ll notice a lock icon located to the left of the website’s address in the address bar. This icon indicates the website’s security settings.
- Adjust Permissions: Click on the lock icon, and a dropdown menu will appear. Look for the permissions related to the camera and microphone. Click on them and select “Allow.” When you give permission, Google Meet can use your camera and microphone in the meeting.
2. Mozilla Firefox:
- Click on the Camera Icon: Similar to Chrome, Firefox also displays an icon indicating the website’s permissions. Look for a camera icon in the address bar when you’re on a Google Meet page.
- Choose “Always Allow”: Click on the camera icon, and a menu will appear. From the options provided, select “Always allow” for both camera and microphone access. This ensures that Firefox always grants permission to Google Meet for these resources.
2. Review Antivirus and Firewall Settings:
Antivirus and firewall software protect your system. However, they may not work well with some apps, like using the camera on Google Meet. To ensure your video conferences aren’t blocked, follow these steps to adjust the settings.
1. Antivirus Software:
Antivirus programs are designed to safeguard your computer against potential threats. They sometimes wrongly label safe apps, such as Google Meet, as risky due to the camera. To troubleshoot this:
- Access Antivirus Settings: Open your antivirus software’s user interface.
- Examine Blocked Applications: Look for a section that displays blocked or restricted applications. Google Meet might be listed there.
- Modify Permissions: To allow Google Meet, modify the settings if it’s on the blocked list. This step might involve adding Google Meet as an exception or marking it as safe.
2. Firewall Settings:
Firewall settings monitor network traffic. Sometimes, they can mistakenly block Google Meet’s data transfer. To address this:
- Access Firewall Settings: To access your system’s firewall settings, go to Control Panel or System Preferences.
- Allow Outbound Connections: Ensure that your firewall permits outbound connections for Google Meet. This allows the application to communicate effectively with the Google Meet servers.
- Temporary Disablement: If needed, you can temporarily turn off the firewall during your Google Meet session. After the meeting, remember to turn it back on to keep your system safe.
3. Verify Operating System Permissions:
Your computer’s operating system decides which apps can access your camera, not just your browser settings. To grant the necessary permissions on Windows and macOS platforms, follow these steps:
Windows:
- Access Camera Privacy Settings:
- Click on the Start menu and select Settings (the gear-shaped icon).
- Navigate to Privacy, then select Camera from the left-hand menu.
- Enable App Access:
- Ensure that the switch next to “Allow apps to access your camera” is turned on. This enables applications like Google Meet to use your camera.
- Scroll down to the section titled “Choose which apps can access your camera.” Make sure your browser, such as Google Chrome, is listed and enabled.
MacOS:
- Access Camera Permissions:
- Click on the Apple menu () in the top-left corner and select System Preferences.
- Choose Security & Privacy, then click on the Privacy tab.
- Enable Browser Camera Access:
- From the left-hand menu, select Camera.
- Make sure your browser (e.g., Google Chrome) is listed on the right side and has a checkmark next to it. This signifies that the browser has permission to access the camera.
4. Extensions and Plugins:
Sometimes, browser extensions and plugins can improve your browsing experience. However, they can also create issues with apps like Google Meet and the camera. To figure out the main problem, turn off these extensions and plugins for now. Follow these steps to troubleshoot:
Access Extension/Plugin Settings:
- Open your browser (e.g., Google Chrome or Mozilla Firefox).
- To find it, look for the menu icon with three dots in Chrome or three lines in Firefox. It’s in the top-right corner of your browser window.
- From the dropdown menu, select Extensions (in Chrome) or Add-ons (in Firefox).
Disable Extensions/Plugins:
- Go to the settings page for extensions and add-ons. There, you’ll see a list of all the extensions and plugins you installed.
- Begin by disabling extensions or plugins one by one. Toggle off an extension, then proceed to test Google Meet to see if the camera issue persists.
- After each test, remember to refresh the Google Meet page to apply the changes.
Identify the Culprit:
- Keep disabling different extensions and testing them until you find the one that is causing the problem with the camera. Once you’ve identified the problematic extension/plugin, keep it disabled.
Re-enable Necessary Extensions/Plugins:
- After you figure out the problem, you can turn on the other extensions/plugins that are not causing issues.
5. Update Browser and Drivers:
If you have old web browsers or camera drivers, you might have trouble using cameras on Google Meet. By regularly checking for updates and keeping these parts up to date, you can usually fix the problem. Follow these steps to ensure you have the latest versions:
1. Update Browser:
- Open your browser (e.g., Google Chrome, Mozilla Firefox).
- Click on the three-dot menu icon (Chrome) or the three-line menu icon (Firefox) in the top-right corner.
- In Chrome, go to the dropdown menu and hover over Help. Then, select About Google Chrome. In Firefox, do the same but select About Firefox.
- The browser will check for updates and ask you to install a newer version. Follow the instructions to update.
2. Update Camera Drivers:
- Access your device’s manufacturer’s website or your computer’s support page.
- Find the newest camera drivers for your device’s model and operating system.
- Download and install the updated drivers following the manufacturer’s instructions.
3. Restart Your Device:
- To make sure the changes work, restart your device after updating your browser and drivers.
6. Clear Cache and Cookies:
Over time, your browser accumulates temporary data known as cache and cookies. Using these features can make browsing faster, but they might cause camera problems on Google Meet. Clearing your cache and cookies can often resolve such problems. Here’s how to do it:
Google Chrome:
1. Access Clear Browsing Data:
- Click on the three-dot menu icon in the top-right corner of the browser.
- From the dropdown menu, select Settings.
- In the left sidebar, click on Privacy and Security.
2. Clear Cached Images and Files:
- Under the “Privacy and security” section, click on Clear browsing data.
- In the dialog box that appears, ensure that “Cached images and files” is selected.
- You can adjust the time range to clear data from the past hour, day, week, or all time.
3. Clear Cookies and Site Data:
- In the same dialog box, also select Cookies and other site data.
- Again, you can adjust the time range as needed.
4. Clear Data:
- Once you’ve made your selections, click the Clear data button.
7. Try Incognito/Private Mode:
To fix camera problems on Google Meet, use incognito mode in Chrome or private browsing in other browsers. This helps identify if browser extensions, cache, or cookies are causing the problem. You can use these modes to browse without extensions and with a fresh cache. Here’s how to use them:
1. Google Chrome (Incognito Mode):
Open an Incognito Window:
- Click on the three-dot menu icon in the top-right corner of the browser.
- From the dropdown menu, select New incognito window.
Access Google Meet:
- In the incognito window, navigate to Google Meet and join a meeting.
Test Camera Functionality:
- When you use incognito mode, extensions are disabled and your regular browsing session doesn’t save cache or cookies.
- Test the camera to see if the issue persists. If the camera is working correctly, the problem with your regular browsing session might be caused by extensions or cache.
2. Other Browsers (Private Browsing Mode):
Open a Private Browsing Window:
- In browsers like Firefox, Safari, or Microsoft Edge, you can find the private browsing option. It’s usually in the same menu where you open new tabs or windows.
- Open a new private browsing window.
Access Google Meet:
- In the private browsing window, navigate to Google Meet and join a meeting.
Test Camera Functionality:
- Private browsing, also known as incognito mode, disables extensions and doesn’t save cache or cookies.
- Test the camera to check if the issue persists. If your camera works in private browsing, it might be because of problems with extensions or cache in your normal browsing.
Google Meet Settings:
To fix camera problems, make sure your Google Meet settings let you use the camera and microphone. Before joining a meeting on Google Meet, you can choose the camera and microphone you want to use. Here’s how to do it:
- Join a Meeting:
- Start by joining a Google Meet meeting as you normally would.
- Access Meeting Settings:
- Before the meeting, you’ll see a gear icon in the bottom-right corner of the preview window. Click on this icon.
- Camera and Microphone Selection:
- In the settings menu, you’ll find options to select your camera and microphone devices. Use the dropdown menus to choose the correct devices you want to use for the meeting.
- Test Devices:
- Google Meet provides a preview of your camera feed and microphone audio. Check these previews to make sure your camera works and your microphone records clear audio.
- Save Settings and Join:
- Once you’ve checked your camera and microphone settings, just click “Save” or “Apply” to confirm.
- Now, you can join the meeting with the correct camera and microphone devices selected.
Google Meet Help Center:
If you’re still having problems with your camera, you can get help from Google Meet’s help center. It’s designed to provide specific troubleshooting advice and solutions for common problems. To access it:
- Access Google Meet Help:
- Open Google Meet and click on your profile picture or initials in the top-right corner.
- From the dropdown menu, select “Help & Feedback.”
- Explore Troubleshooting Resources:
- The help center has many articles about fixing camera and microphone problems, and more.
- Find solutions by searching for your specific problem or navigating through the sections.
Common Error Messages and Solutions
Here’s a table of common error messages related to “Camera blocked on Google Meet” along with their corresponding solutions:
| Error Message | Solution |
|---|---|
| “Camera is disabled” | Check browser permissions and antivirus settings. |
| “No camera found” | Verify camera drivers and operating system settings. |
| “Camera is in use by another app” | Close other applications using the camera and reload the meeting. |
| “Camera permissions denied” | Adjust browser permissions and operating system settings. |
| “Camera is blocked by an extension” | Disable browser extensions/plugins and retest. |
| “Camera access requested but not granted” | Allow camera access in your browser settings. |
| “Camera is not detected” | Update browser and camera drivers, restart the device. |
| “Camera not working” | Clear browser cache and cookies, then test. |
| “Camera is disconnected” | Check physical camera connections and restart the device. |
This table provides a comprehensive reference for users encountering specific error messages related to camera access issues on Google Meet, offering appropriate solutions tailored to each scenario.
Additional Tips for Successful Video Conferencing
- Stable Internet: Having a reliable internet connection is crucial for seamless video calls.
- Lighting: Ensure good lighting to enhance your video quality.
- Microphone: Test your microphone beforehand to ensure clear audio.
Conclusion
In the virtual world, overcoming technical problems is a powerful achievement. Now we know how to fix the “Camera blocked on Google Meet” message. You can use simple solutions. To make sure your camera works in meetings, learn about your browser’s settings, permissions, and fixing problems.
Keep in mind that technology is always changing. Temporary hurdles, like camera blockage, will come up. Use your knowledge to defeat them fast and resume uninterrupted video conferencing. Embrace your new skills and enter virtual meetings confidently. You have the power to fix camera issues and have productive conversations. Go ahead and troubleshoot. Conquer and let your virtual interactions shine in digital collaboration.
Additional Resources and Support
For more information and assistance, refer to the official Google Meet help center. Also, Check out our other blog posts about google meet, and tips on keeping your smartness on virtual meaning.
- Google Meet Help Center
- Visit the Google Meet Community for peer-to-peer assistance.
- For personalized support, contact Google Meet Support for expert guidance.
- How to Unblock The Mic and Camera on Google Meet on Mac
- Using Your Phone as a Mic For Google Meet – A Proper Guide
- How to Unblock The Mic and Camera on Google Meet on Mac
- How to Unblock Camera on Google Meet – Unveiling Your Video!
- Does Google Meet Have Camera Filters – Exclusive Information
- Why Won’t My Camera Work On Google Meet: Solving the Mystery
1 thought on “How to Fix the “Camera Blocked on Google Meet” Message?”