Trail cameras have become increasingly popular in recent years. This is likely due to the fact that they offer a wealth of benefits, such as security, wildlife observation, and more. If you are new to trail camera use, you may be wondering how to program a trail camera for optimal performance. It’s very easy but need to know about Trail camera. When you will know very well about Trail camera Then It’s have very easy for you to program. In this blog post, we will walk you through the process of programming a trail camera. Stay tuned!
Contents
- 1 What is a trail camera and what are its uses
- 2 How to program a trail camera for the first time
- 3 Tips for getting the most out of your trail camera
- 4 Common problems with trail cameras and how to fix them
- 5 Accessories that can make using your trail camera easier
- 6 The best way to store your trail camera when it’s not in use
- 7 Some related FAQ
- 8 Conclusion
What is a trail camera and what are its uses
A trail camera is a type of camera that is designed to be used outdoors. Hunters frequently utilize trail cameras to follow game. However, they can be used for a variety of different things, like security or wildlife observation. Trail cameras are typically small and compact, and they can be mounted on a tree or stake. They are powered by batteries. And they use infrared technology to take pictures or videos in low-light conditions.
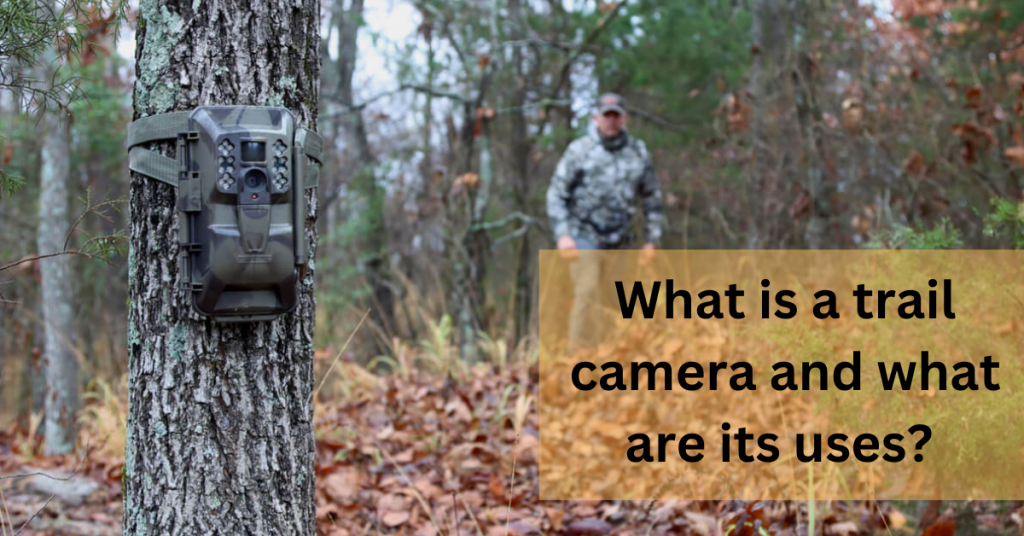
Trail cameras are activated by motion, and they can take pictures or videos day or night. One of the main advantages of trail cameras is that they can be left in a remote location for long periods. Without requiring any attention. This makes them an ideal tool for studying wildlife or monitoring a property. More datils about Trail camera.
How to program a trail camera for the first time
Trail cameras are a great tool for hunters and wildlife enthusiasts alike. They allow you to get a closer look at the wildlife in your area and can help you pattern game animals. If you’ve never programmed a trail camera before, here’s a quick guide. First, you’ll need to decide where you want to place the camera.
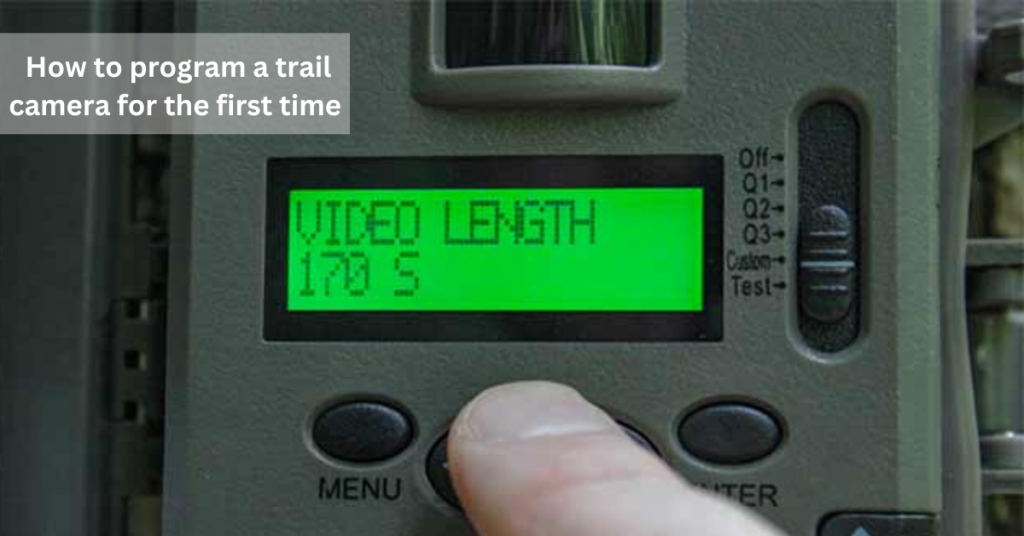
Trail cameras can be mounted on trees, posts, or placed on the ground. Once you’ve chosen a spot, make sure the camera is level and pointing in the direction you want it to. Then, you’ll need to select the settings for your camera. Most trail cameras have options for photo or video, time-lapse, and infrared light and imaging. You’ll also need to choose how often you want the camera to take pictures or videos. After choosing your settings, you must program the camera.
Trail cameras usually have a keypad that allows you to input your selections. To program the camera, follow the directions in your owner’s manual. Once you’ve programmed the camera, it’s ready to use. Place it in your chosen spot and wait for the wildlife action to begin!
Tips for getting the most out of your trail camera
Trail cameras are a great tool for wildlife enthusiasts and hunters alike. By setting up a camera in a strategic location, you can get better insights into the movements and habits of your target animal. Here are some suggestions to maximise the use of your trail camera.
1. Choose the right location. The key to getting good results with a trail camera is to choose a location. That is popular with the animals you’re trying to photograph. Look for areas with fresh tracks or droppings, and try to set up your camera near a water source or food source if possible.
2. Be patient. It can take some time to get the results you’re after, so don’t expect to see perfect results overnight. Be patient and wait for the animals to get used to the camera before moving it to another location.
3. Check your camera regularly. Trail cameras are designed to be left alone for long periods of time. But that doesn’t imply you should completely disregard them. Check your camera regularly to make sure it’s still working properly. And that there’s no damage from the weather or other wildlife.
Following these tips. You’ll be able to get the most out of your trail camera and get some great photographs in the process.
Common problems with trail cameras and how to fix them
Trail cameras are a valuable tool for hunters, giving them the ability to scout an area without disturbing the wildlife. However, when they malfunction, they can be frustrating as well. Here are some of the most common problems with trail cameras and how to fix them.
One of the most common issues is that the camera doesn’t take clear photos. This can be caused by a number of things, including dirt or debris on the lens, a setting that is too dark or light, or a camera that is not in focus. To fix this, start by cleaning the lens and making sure that the settings are correct. If the problem persists, try focusing the camera manually.
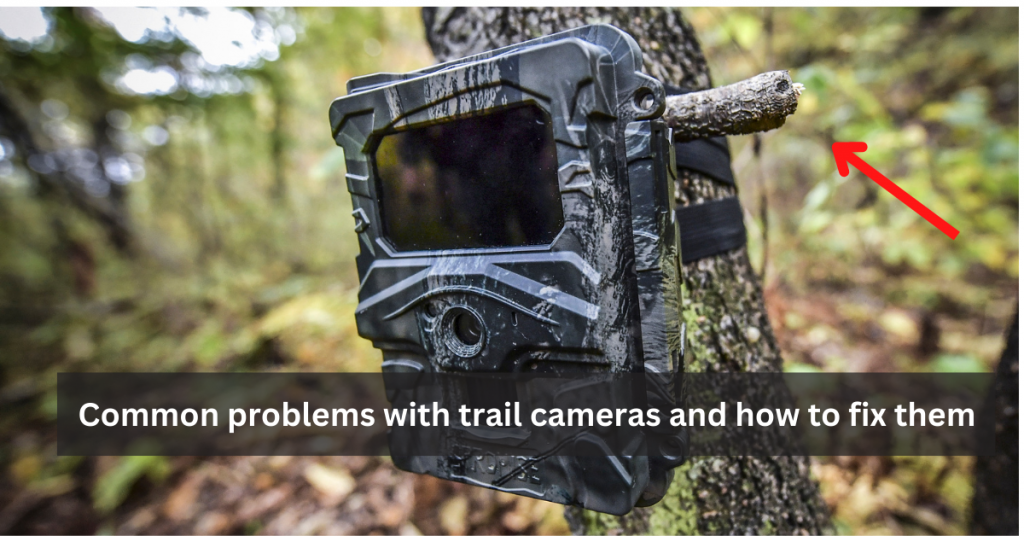
Another common issue is that the camera doesn’t trigger when an animal walks by. This is often due to a sensor that is not properly calibrated. To fix this, try moving the sensor closer to or further away from the camera until it is triggering at the correct distance.
Trail cameras can be a great way to get insights into the wildlife in an area. You can ensure that your trail camera is working correctly and capturing clear images.
Accessories that can make using your trail camera easier
Trail cameras are a great tool for hunters and nature enthusiasts alike, but they can be a bit tricky to use. Thankfully, there are a few accessories that can make the process much easier. One of the most important is a camera mount.

Your camera will be level and stable as a result. Preventing blurry or shook-up images. Another helpful accessory is an external battery pack. This will give your camera power. It needs to run for extended periods of time, meaning you won’t have to keep changing batteries.
Finally, a solar panel charger can help to keep your camera’s batteries topped off. Even if you’re in a remote location. With the right accessories, using a trail camera can be a breeze.
The best way to store your trail camera when it’s not in use
Trail cameras are a vital tool for wildlife enthusiasts and hunters alike. Providing a way to remotely capture images of animals in their natural habitat. However, when trail cameras are not in use, it is important to store them properly to ensure. That they are ready for action when needed. Removing the battery and memory card is the best method to preserve a trail camera. Then place the camera in a cool, dry location. This will help to prolong the life of the camera and prevent damage from occurring.
Additionally, it is important to check on the condition of the camera periodically. As exposure to the elements can cause wear and tear over time. By following these simple tips, you can be sure that your trail camera will be ready to go when you need it.
Do you want to know about DSLR camera? actually I will share you Is Nikon Camera Best For You: Beginners Guide. Because I think you like photography, if you want to know, CLICK HERE.
What should the PIR interval be set on a trail camera?
Problem: What should the PIR interval be set on a trail camera?
Agitate: Trail cameras are made to be abandoned for extended stretches of time. But that doesn’t imply you should completely disregard them. Check your camera regularly to make sure it’s still working properly. And that there’s no damage from the weather or other wildlife.
Solution: Following these tips will help you get the most out of your trail camera and get some great photographs in the process.
How do I format my trail camera SD card?
- Locate the SD card slot on your trail camera.
- Insert the SD card into the slot.
- Press and hold the button on the side of the camera to format the card.
- Wait until the formatting is complete.
- Remove the SD card from the camera.
- Insert it into your computer.
- Format the SD card using the FAT.
How do you set up cellular trail cameras?
There are a few different ways to set up cellular trail cameras. You can either use a prepaid SIM card, or you can sign up for a monthly plan.
If you choose to use a prepaid SIM card, you will need to purchase one that is compatible with your camera. Then, follow the instructions provided by the manufacturer to activate the card. Once it is activated, the camera will be able to send photos and videos directly to your phone or email address.
If you choose to sign up for a monthly plan, you will need to provide your contact information and payment information. The camera will then be connected to an LTE network and will send photos and videos directly to your phone or email address.
Conclusion
In this blog post, we have share you through the process of how to program a trail camera. While every camera is different, the basic steps are generally the same. After use, the trail camera needs to be reset for the next use.
Be sure to experiment with your camera’s settings until you find what works best for you and your individual needs. As always, if you have any questions or need help troubleshooting your trail camera, feel free to reach out to us. We are happy to assist!
7 thoughts on “How to Program a Trail Camera : Guide For You”