Photography shows us a hidden world. Ordinary things become extraordinary, beyond what we see. This mystical realm is none other than infrared photography. Photographers use Techniques for Capturing Infrared Image special lighting to capture beautiful photos of landscapes, portraits, and artwork.
In this article, we will explore the world of infrared photography. We will learn about techniques, equipment, and artistic possibilities.
They help us capture unseen things and make images that challenge our view of reality. If you like photography, get ready to learn how to take amazing pictures with infrared.
Contents
Understanding Infrared Photography:
1. Defining Infrared Photography:
Infrared photography is a fascinating technique that can see more than the human eye. Infrared light, invisible to us, can show hidden details and ethereal beauty. This special type of picture-taking has a long past and is used for science and art.
2. The Science of Infrared Light:
To understand infrared photography, you must know about infrared light and its science. Infrared light has longer wavelengths than visible light. It ranges from 700 nm to 1 mm. This extended wavelength range allows it to interact with objects in distinctive ways.
One of the fascinating aspects of infrared light is its ability to capture heat. Infrared photography lets us see things our eyes can’t and reveals temperature differences. Infrared photography can detect heat in different situations. It can be used to check industries, save people, or diagnose illnesses.
Furthermore, infrared light interacts differently with various materials. It can penetrate some substances while being absorbed or reflected by others. Infrared images are intriguing because of their unique textures and captivating contrasts. Infrared photos show plants, water, and skin differently than regular light. They are unique.
3. Types of Infrared Photography:
Infrared photography isn’t a one-size-fits-all technique. Infrared photography has three main types, each with different wavelengths and uses.
- Near-Infrared Photography: Near-infrared photography is the most commonly practiced form of infrared photography. It typically covers the range of approximately 700 to 1,000 nm. We often use near-infrared light for aerial photos, crop analysis, and security systems. Near-infrared light can show hidden details, which is useful in surveillance and agriculture.
- Mid-Infrared Photography: Captures images using wavelengths between 1,000 and 5,000 nm. Scientists frequently use this range for research, especially in astronomy and environmental monitoring. It can reveal unique chemical and thermal information about objects in the frame.
- Far-Infrared Photography: Scientists and businesses study different types of light using far-infrared photography. Thermal imaging cameras are used in firefighting, building inspections, and space exploration. They can detect very cold temperatures.
Equipment and Gear for Capturing Infrared Image:
01. Cameras Suitable for Infrared Photography:
Not all cameras are equally adept at capturing infrared light. Cameras for infrared photography need specific qualities to work well with this technique. Here are some key considerations when choosing a camera for infrared photography:
- Full Spectrum Cameras: They are popular among infrared enthusiasts. The cameras’ filters were changed to let more infrared light reach the sensor.
- Mirrorless Cameras: Mirrorless cameras are great for infrared photography. You can change lenses and adjust settings easily. However, many DSLR cameras can also be modified for infrared use.
- Sensitivity to Infrared Light: Different cameras have different sensitivity to infrared light. That affects how well they can capture it. Research the specifications of your camera model to determine its infrared sensitivity.
- Live View Mode: Cameras with live view mode display the infrared effect on the LCD screen in real time.
- White Balance Control: Adjustable white balance fixes color shifts in infrared photos.
- Interchangeable Lenses: Try to find one that lets you use different lenses. Using different lenses can provide varied results in infrared photography.
02. Infrared Filters and How They Work:
Infrared filters are important in infrared photography. They help control the type of infrared light that reaches your camera’s sensor. Here’s how they work and how they can be used for various effects:
- Filter Types: Infrared filters come in different types. They block or let through certain wavelengths of light. Infrared filters come in different types. One type is IR pass, which lets infrared light through but blocks visible light. Another type is IR cut, which blocks infrared light but lets visible light through. Dual-band filters allow both infrared and visible light to pass through.
- Creating Contrast: Infrared filters add dramatic contrast to your images. You can make infrared-reflective subjects stand out by blocking certain visible light.
- Filtration Effects: Different filters can produce different creative effects. A deep IR pass filter gives strong infrared effects. A dual-band filter makes surreal false-color images.
- Filter Attachment: Attach them to your camera lens using a filter holder or lens adapter. Ensure that your chosen filter size matches your lens’s filter thread size.
03. Infrared-Sensitive Films and Digital Sensors:
Infrared photography can be pursued using both film and digital cameras. Understanding the options available for capturing infrared light is essential:
- Infrared Film: Specialized infrared-sensitive films are available for film camera enthusiasts. These movies use filters to capture infrared light and create impressive infrared images.
- Digital Sensors: These use filters to block infrared light, yet they can still detect it. This helps digital photographers. Photographers can improve infrared vision by changing or replacing camera filters.
- IR Conversion: Many people who like infrared photography have experts convert their cameras. To do this, you need to take out the filter that blocks infrared light. Then, put in a filter that lets infrared light pass through. Converted cameras become dedicated infrared tools.
04. Choosing the Right Equipment:
Selecting the right equipment for your infrared photography needs is a critical step. Consider the following factors when choosing your gear:
- Budget: Determine your budget and explore equipment options within that range. Keep in mind that modifying a camera for infrared use can add to the overall cost.
- Photographic Goals: Think about your photographic goals. Are you interested in landscape, portrait, or scientific infrared photography? The choice of equipment may vary based on your intended subjects.
- Existing Gear: If your camera can do infrared photography before buying new equipment.
- Experimentation: Infrared photography often involves experimentation. Don’t be afraid to try different cameras, filters, and lenses to achieve the results you desire.
Setting Up for Capturing Infrared Image in Photography:
01. Choosing the Right Time and Conditions:
Timing and environmental conditions significantly impact the success of an infrared photo shoot. Here are some considerations for achieving optimal results:
- Time of Day: Infrared photography works best during midday when the sun is high in the sky. During these times, there is a lot of infrared light, which makes the effects in your images stand out more.
- Weather Conditions: Cloudy days make it easier to take infrared photos. The light is consistent and shadows are reduced. However, sunny days can produce striking infrared landscapes with strong contrast.
- Seasonal Changes: Different seasons can offer unique opportunities for infrared photography. In spring or autumn, taking pictures of deciduous trees can give beautiful results. The trees reflect or soak up infrared light in unique ways.
- Reflective Surfaces: Lakes and rivers can create beautiful reflections in infrared photos. Keep an eye out for opportunities to include these elements in your shots.
02. Composing Infrared Shots:
Composition remains crucial in any type of photography, including infrared. Here are some tips for composing visually striking infrared images:
- Leading Lines: Use paths, roads, or fences to guide the viewer’s eye through the image.
- Foreground Interest: To make your infrared landscapes more interesting. Add captivating objects in the foreground.
- Rule of Thirds: To create a balanced and pleasing image, follow the rule of thirds when composing.
- Frame Within a Frame: To make your photo stand out, look for arches or branches that can frame your subject.
- Minimalism: Make your writing simpler by focusing on one subject or a few elements. This creates a calm and simple image.
03. Focus and Exposure Considerations:
Infrared light can affect focus and exposure differently than visible light. To take clear and well-lit photos, it’s important to know how to change your camera settings.
- Manual Focus: Switch to manual focus because autofocus systems struggle with infrared light. Practice focusing your camera by using the distance markers on your lens. You can also try trial and error.
- Exposure Compensation: The camera has trouble measuring infrared brightness. so infrared images might require exposure adjustments. Experiment with exposure settings to achieve the desired effect.
- Bracketing: To get a good picture in tricky lighting. take several photos with different settings.
04. White Balance Adjustments:
White balance adjustments are essential for achieving accurate colors in your infrared images:
- Custom White Balance: To get more accurate colors. use the custom white balance setting on your camera. To do this, take a picture of a white or gray card in the same lighting as your scene.
- Post-Processing: After you finish processing. you can change the white balance to fix the colors. Photographers change the white balance. This makes blue skies cool and foliage golden.
Techniques for Capturing Infrared Image in Photography:
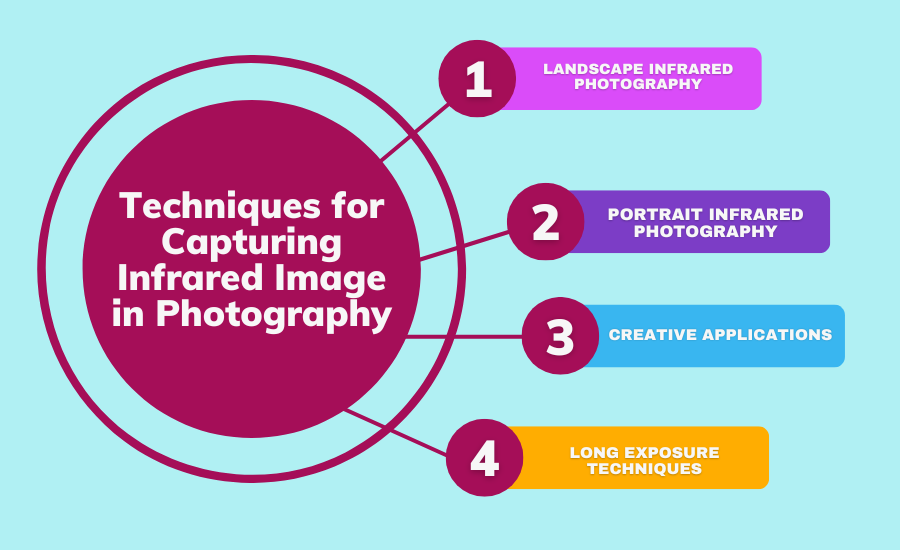
1. Landscape Infrared Photography:
Explore techniques for capturing stunning, dreamlike landscapes in infrared:
- Finding Compelling Landscapes: Scout locations with interesting features like trees, and fields. Or architectural elements that can be transformed into captivating infrared landscapes.
- Balancing Composition: Apply the composition tips mentioned earlier. to create visually engaging landscape images.
- Optimizing Lighting: Experiment with different lighting conditions. to see how they impact your landscape shots. Cloudy days create gentle lighting, but direct sunlight makes strong contrasts.
2. Portrait Infrared Photography:
Discover how to create unique and captivating portraits using infrared techniques:
- Choosing the Right Subjects: Select subjects with distinct skin tones and features. As infrared light interacts uniquely with different skin types.
- Lens Selection: Experiment with different lenses. To achieve varying levels of detail and distortion in your infrared portraits.
- Posing and Expression: Work closely with your subjects. Infrared can make portraits seem mystical and ethereal, capturing personalities and emotions.
3. Creative Applications:
Explore the creative side of infrared photography, where surreal and imaginative possibilities abound:
- Experiment with Filters: Combine different infrared filters. To create unique color and tonal effects in your images.
- Multiple Exposure: Try multiple exposure techniques. To blend infrared and visible light in one frame for an otherworldly look.
- Infrared Panoramas: Combine different infrared images. To capture the stunning beauty of the infrared spectrum and create panoramic views.
4. Long Exposure Techniques:
Long exposure adds a dreamy and ethereal quality to infrared landscapes. Master this technique with the following steps:
- Sturdy Tripod: Use a sturdy tripod to keep your camera steady. during long exposures, preventing blur.
- Neutral Density Filters: Use neutral density filters to block excess light. during long daylight exposures.
- Long Exposure Calculations: Try different exposure times. To get the motion blur you want in moving things like water or clouds.
Common Challenges and Troubleshooting:
1. Addressing Potential Issues:
Infrared photography, while rewarding, comes with its share of challenges. Here are some common issues you may encounter and how to address them:
2. Hot Spots:
Hot spots are bright areas in your images caused by reflections from the lens or camera. To reduce or eliminate hot spots:
- Use a lens hood to block stray light.
- Avoid using extremely wide-angle lenses, as they are more prone to hot spots.
- Experiment with different angles to minimize reflections.
3. White Balance Problems:
Getting accurate white balance in infrared photos is challenging, causing color shifts. To address white balance issues:
- Capture a custom white balance using a white or gray card in the same lighting conditions as your scene.
- Fine-tune white balance during post-processing to achieve the desired color rendition.
4. Focus Issues:
It is difficult to focus precisely because infrared light has different wavelengths. To overcome focus problems:
- Use manual focus and the camera’s distance scale.
- Test focus using live view mode on your camera’s LCD screen.
- Practice focusing at different distances to become more proficient.
Providing Solutions:
Troubleshooting in infrared photography often involves experimentation and fine-tuning. Here are some solutions and tips to overcome common challenges:
- Bracketing: If you’re not sure about exposure or white balance. take multiple photos with different settings. This will help improve them. This will ensure that you capture at least one image with the desired result.
- Post-Processing: Embrace the power of post-processing. If you want better infrared images, use software like Adobe Lightroom or Photoshop. These tools can correct exposure, contrast, color balance, and other issues.
- Lens Choice: Try different lenses. to find ones that create few hot spots and good image quality in infrared.
- White Balance Correction: Adjust the white balance after taking the photo. to get the colors you want. You can create various creative looks by adjusting white balance settings.
Safety and Legal Considerations:
Here’s a table summarizing the safety and legal considerations for infrared photography:
| Aspect | Description |
|---|---|
| Safety Precautions | Infrared photography is usually safe, but understanding risks and taking precautions is essential. |
| Infrared Filters | – When using infrared filters, be cautious of the sun’s concentrated infrared light, which can damage eyes or camera sensors. – Always use a viewfinder cover or shoot in live view mode to avoid accidental sun exposure. |
| Protective Gear | – In cases requiring strong infrared lights, protect your eyes by wearing appropriate eye gear. |
| Weather Conditions | – Be prepared for various weather conditions when shooting outdoors for infrared photography. – When shooting in remote or rugged areas, anticipate changes in weather and terrain. |
| Legal Considerations | When engaging in infrared photography, it’s important to consider both safety and legal aspects. |
| Private Property | – Obtain necessary permissions from property owners or managers when planning to shoot on private property. – Respect any restrictions they may impose. |
| Public Spaces | – In many public spaces, photography is generally allowed. – Be aware of local regulations and restrictions, particularly when using infrared photography for commercial purposes. |
| Sensitive Areas | – Locations like military installations or government facilities may have strict photography restrictions. – Always adhere to posted guidelines and respect security measures in such areas. |
| Privacy Laws | – Respect the privacy of individuals when capturing images in public spaces. – Be aware of any laws governing the use of photographs of people in your area, especially in regard to privacy and consent. |
| Drone Use | – If using a drone for infrared photography, familiarize yourself with local drone regulations, which can vary widely depending on the location. – Ensure compliance with drone rules to avoid legal issues and ensure safe operation. |
These considerations will help ensure a responsible and enjoyable experience while capturing infrared images while adhering to safety and legal guidelines.
Conclusion:
We have learned about infrared photography, which has many artistic options for photographers. These techniques reveal dreamlike landscapes, mesmerizing portraits, and boundless creative expression.
They uncover a hidden realm. Infrared photography makes us think about how we see and tell stories with pictures. It allows us to discover a new and captivating way of looking at the world. To become skilled at infrared photography, practice, experiment, and enjoy capturing unseen subjects.
To create stunning pictures, use the right tools, know science, and be imaginative. These images can inspire and remind us that there’s always more to see than what meets the eye. So, pick up your camera, venture forth into the world of infrared, and let your imagination soar.
X. Additional Resources:
To improve at taking infrared photos, read tutorials and watch videos. You can also join photography communities.
Also, Check out our other blog posts about infrared cameras photography, tips and guide!
- Can Any Camera See Infrared Light
- Why is The Infrared On Camera Not Working
- Infrared Light Detection with Camera: Unlocking the Secrets!
- How Infrared Technology Use in Night Vision Camera?